How to Build a Charcuterie Board
Good food brings people together and nourishes the soul.
A feast for the eyes.
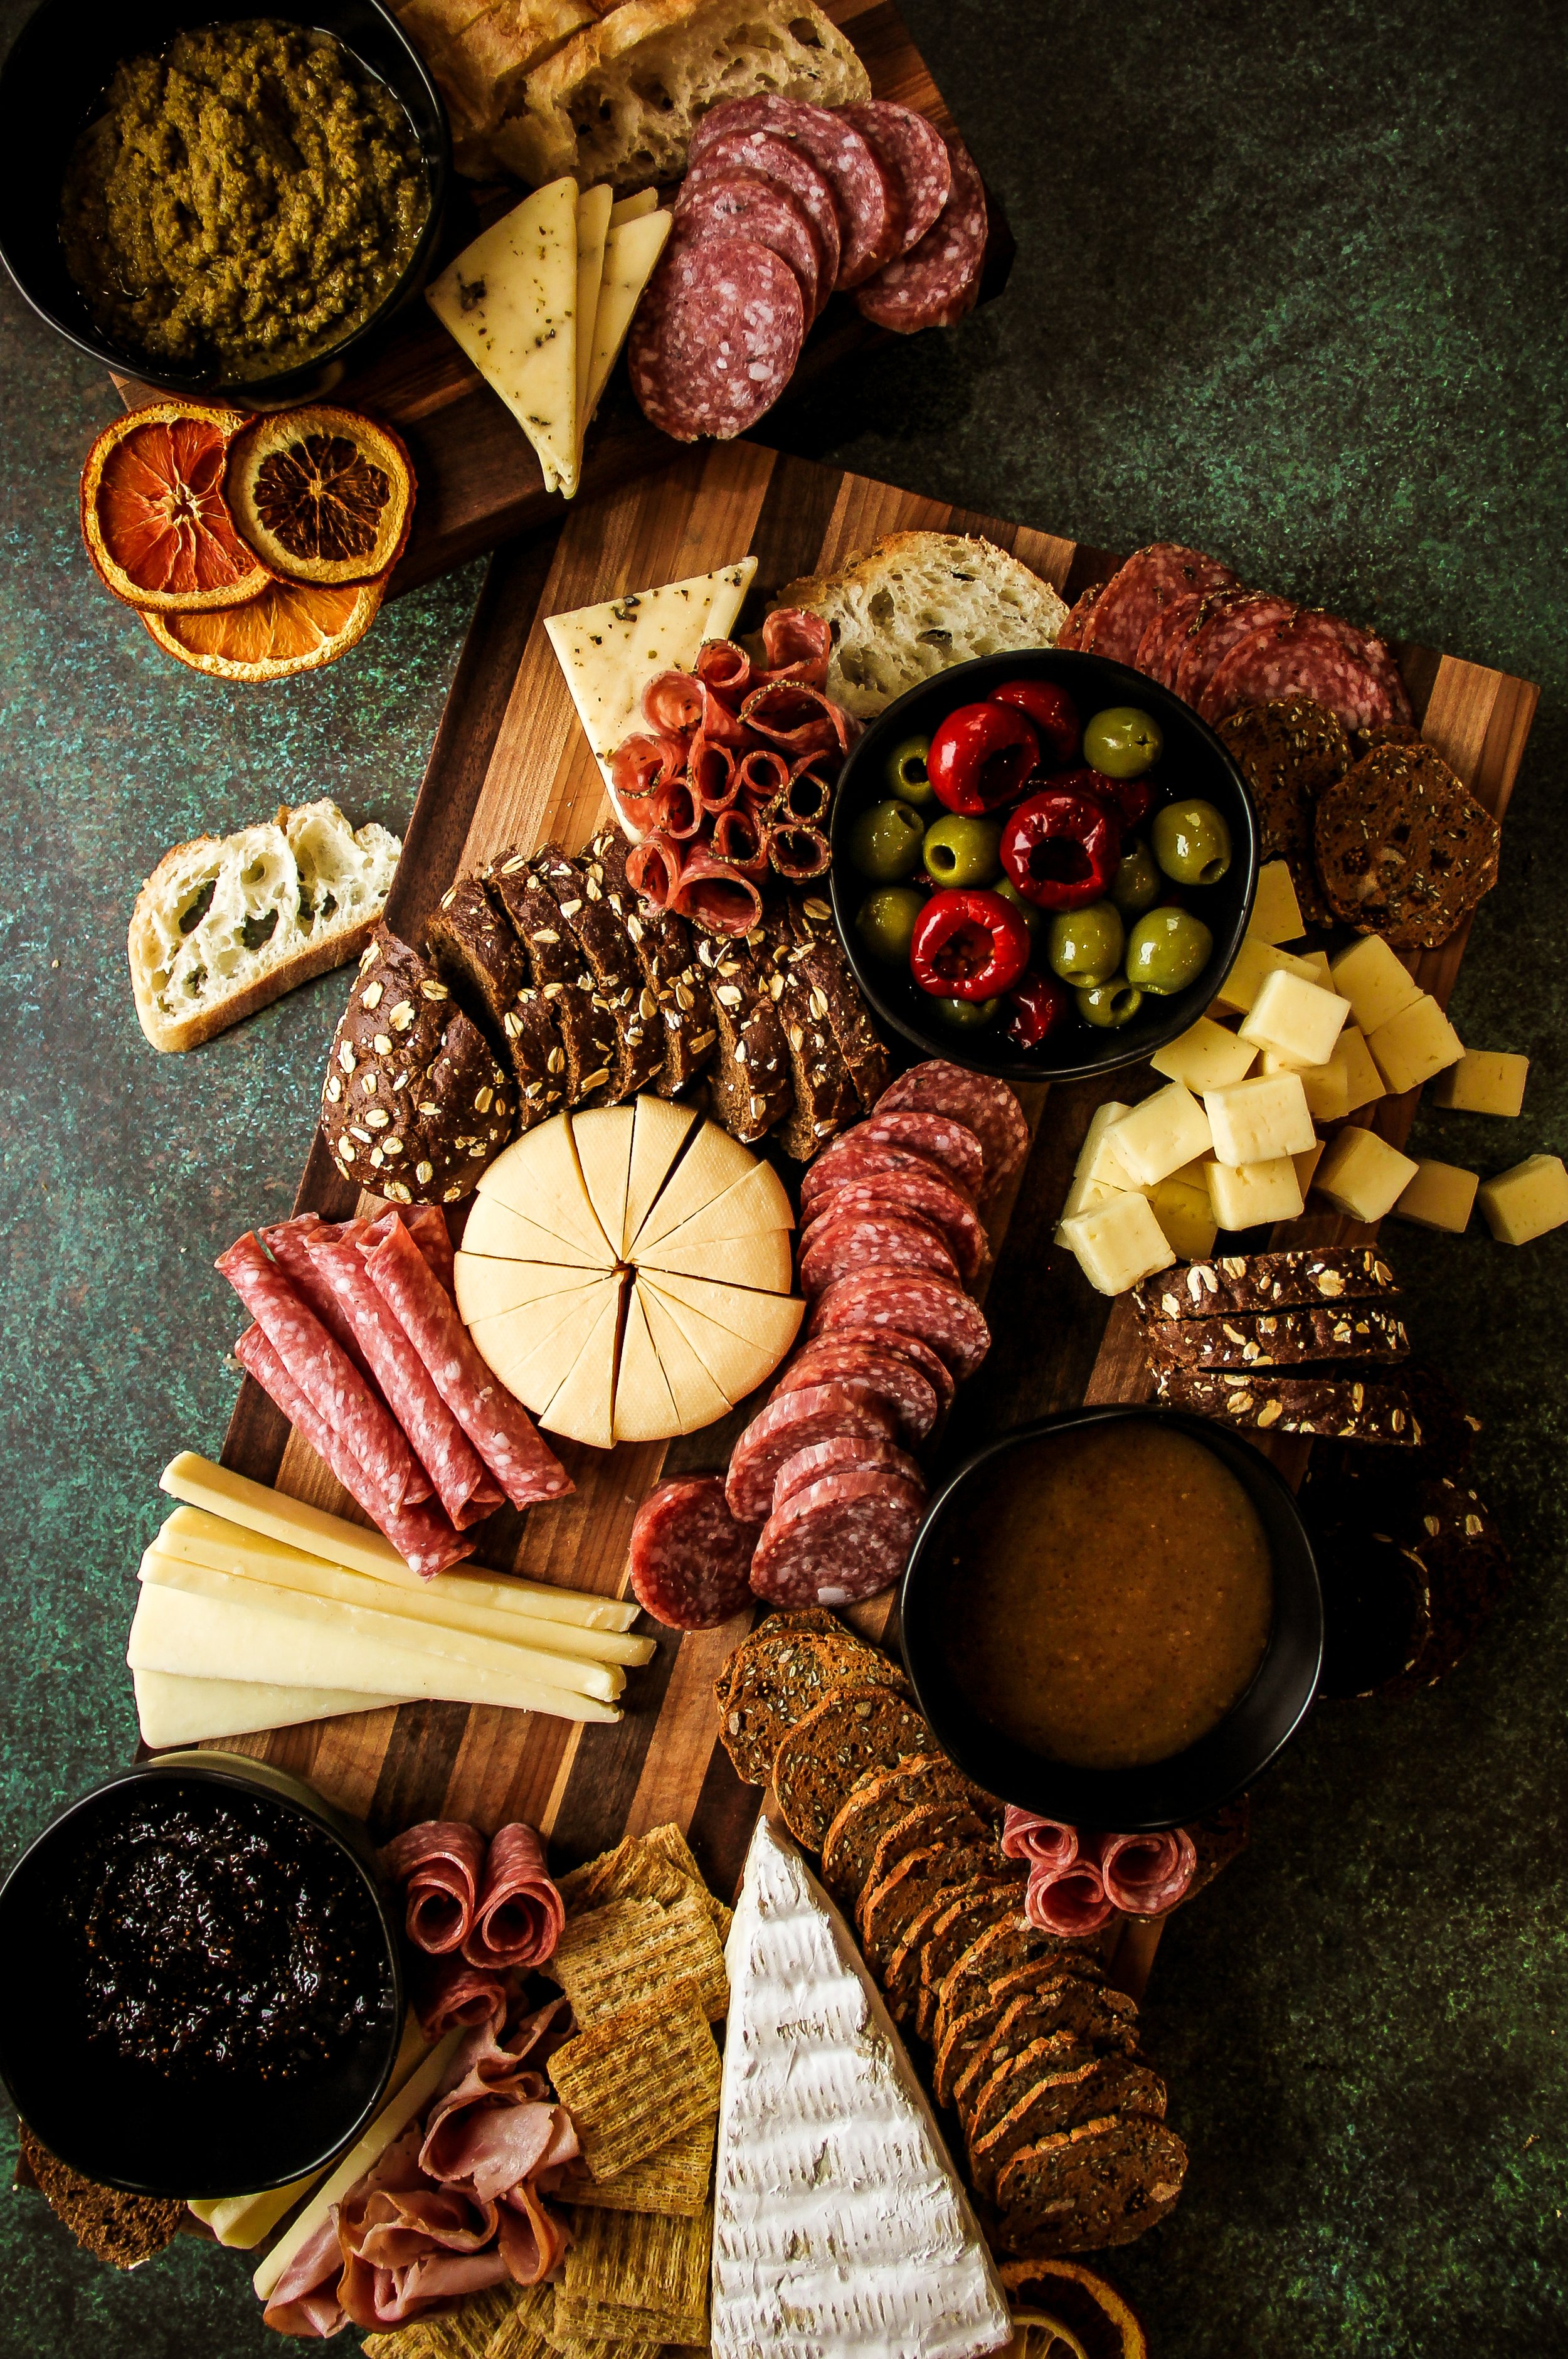
“If you build it they will come…” Does quoting Field of Dreams age me? Probably. But I couldn't help but giggle while I was putting this gorgeous spread together. It’s absolutely true. If you build a charcuterie board like this, filled with texture, color, and flair, your guests will swarm like bees on honey. It’s essentially a grazing table. People can strike up conversation while they nourish their bellies and taste a unique spread of vibrant flavors.
Building a stunning charcuterie board may seem overwhelming, especially when you’re looking for ideas on Pinterest or Instagram. Those boards, like mine, are filled to the max. It’s hard to know where to begin. I recommend following these simple guidelines to make the process fun and easy:
Mix it up: Shapes, colors, textures, and flavors create interest and keep your eyes moving. Select a variety of cheeses; cut them up in different angles. Stack, roll, and layer your salami and prosciutto. Add a mix of salted crunchy crackers with sweeter softer sliced baguettes. Make each addition an experience that is begging to be tried.
Combine savory with sweet: Layer your flavors. Savory and sweet work beautifully together and offer variety. Pair a honey champagne mustard with a smokey brie. Add fresh berries or dried apricots to compliment spiced nuts. Try a peppered salami with a fig jam. Get fancy.
The more the merrier: Make it inviting by filling the board to the max. Fresh herbs, dried fruit, olives, peppers, dark chocolate, candied nuts…these are all great ways to fill those spaces between the cheese and crackers. Don’t be afraid to add an extra board or let some pieces fall off the edge of the board. Trust me, someone will eat them.
Find balance: Ground your board with the larger items first. Spread them out, so one side doesn’t become overweighted. I start with small bowls filled with jams or dips. I arrange them in a “C” shape. This creates movement. Then I add the cheeses. Next is the meat selection. Then I add the crackers and breads. Then I fill the holes with smaller additions, like nuts and dried fruit. Pay attention to color. If you add green or a pop of red to the top, add to the bottom.
* See photos below for reference.
Whether you’re creating a hot chocolate board, a cheese board, or a waffle board, this approach will help you create seamlessly. Remember, the goal is to bring people together for a memorable dining experience. Be organic and free, and enjoy.


